How to display module positions in joomla templates
The process of display the module positions in Joomla templates is the same like in all Joomla templates. To show module positions and their names on frontend you need to do following steps:
1. Go to administration of your Joomla website
2. Go to Extensions -> Template Manager(Joomla 3)
or to System -> Templates -> Site Templates (Joomla 4 - Joomla 5)
3. Click Options in the upper right corner
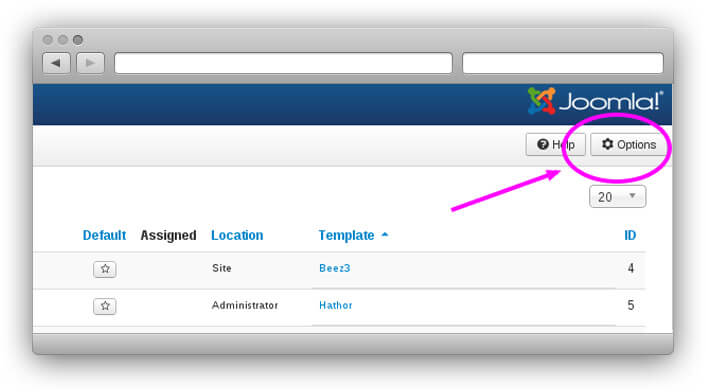
Joomla 3
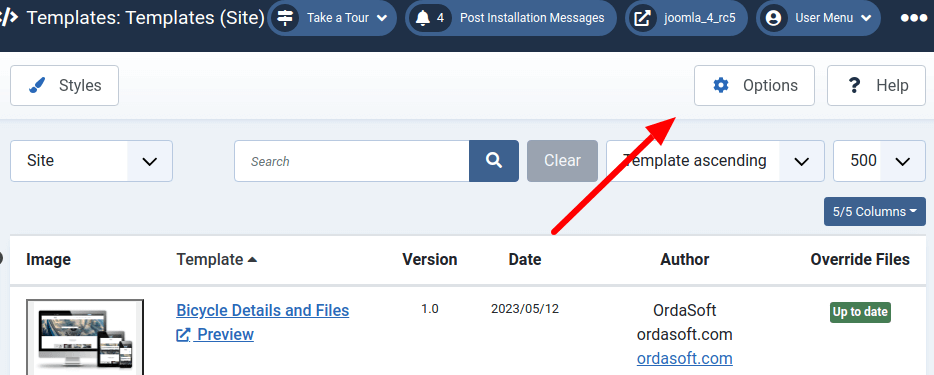
Joomla 4 - Joomla 5
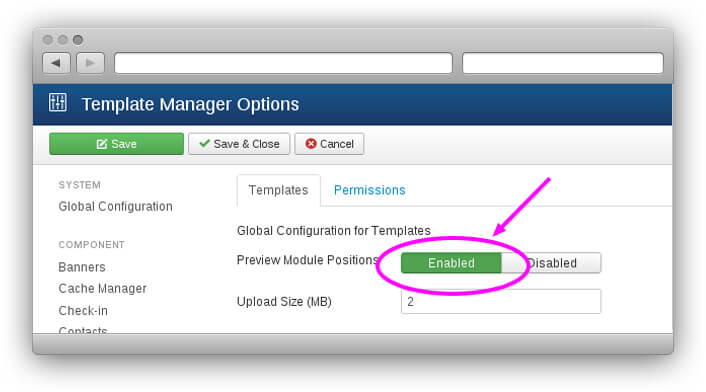
4. Set Preview module positions to Enabled
5. Come back to frontend and add "?tp=1" to URL of page where you want to see module positions.
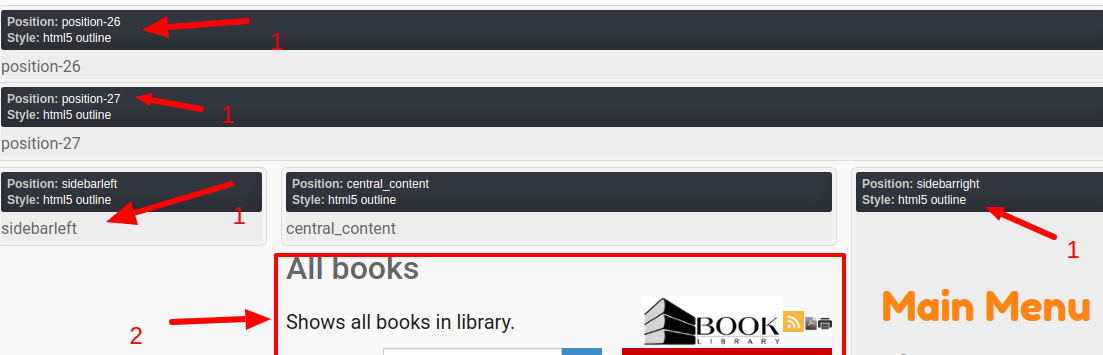
Now you can see module positions and their names on frontend of your website.
Please check 1 - on the image - the module positions - you may show there any Joomla modules - with help Joomla Module manager. As Example in module position "sidebarright" you see there "Main menu" (In Joomla Module manager - for this position was set module "Menu" and it this module was set - show "Main menu"). More: How to show joomla module in joomla modules positions
Please check 2 - on the image - the position - where Joomla show "Main component content", There will show content of page - which you define in Joomla Menu manager for every Menu Item
More useful links:
Joomla load module to articles: loadmodule, loadposition, loadmoduleid.
How to show joomla module in joomla modules positions.
How to download Ordasoft products?
When you became our club member (Pro Membership or Developer Subscription) and want to download Ordasoft Joomla, Drupal, WordPress themes or Joomla extensions, you need to follow these steps:
1. Log in on the site
You have to log in on our website. The log in button is placed in upper right corner.
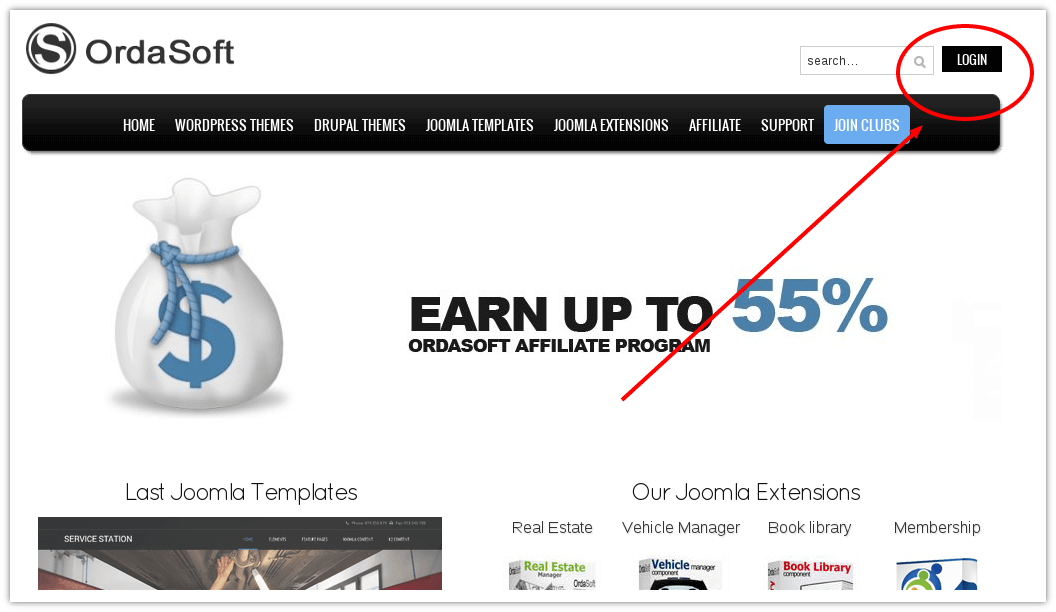
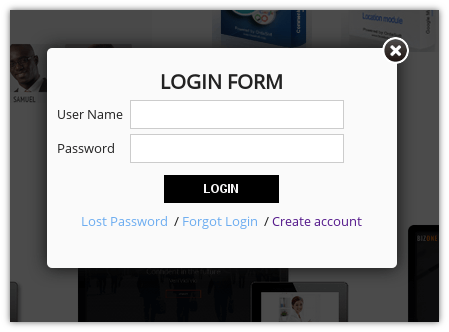
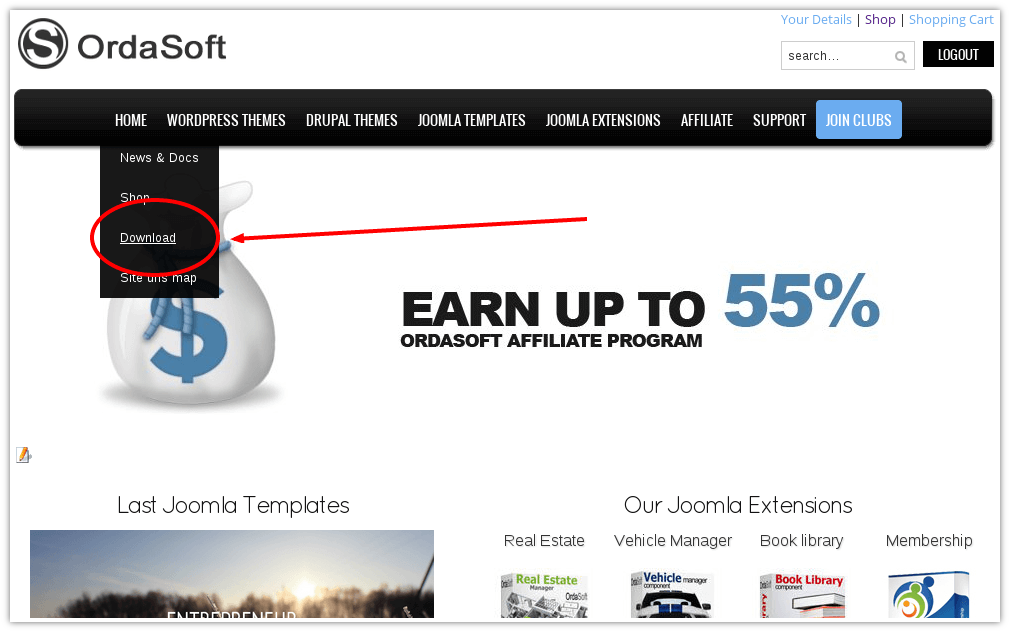
2. Downloads
Then you should go to menu "Home", menu item "Downloads"
3. Choose Ordasoft Club Downloads
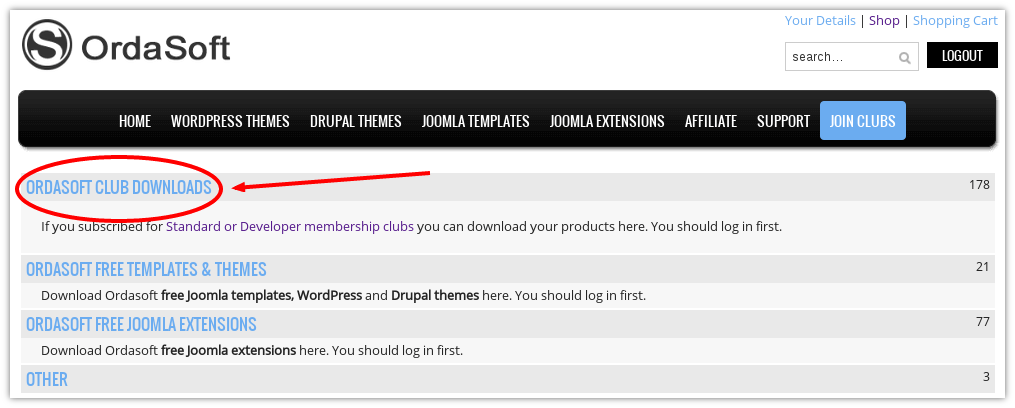
4. Choose your club
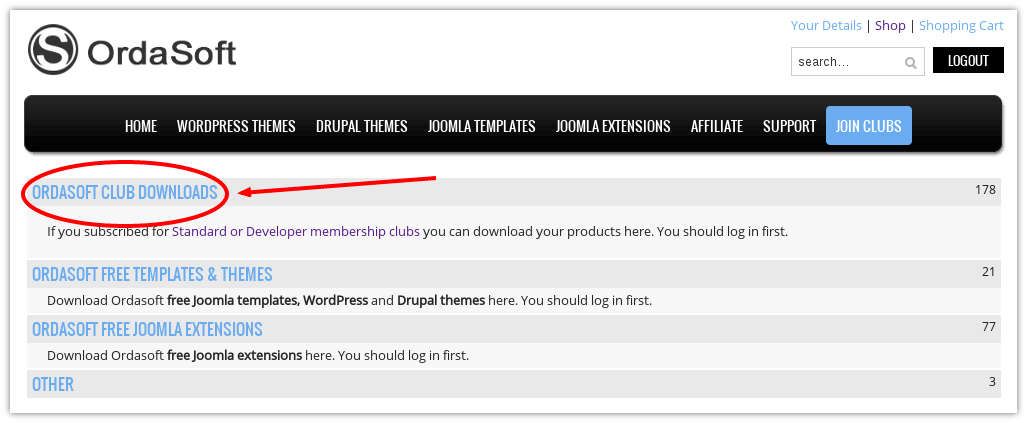
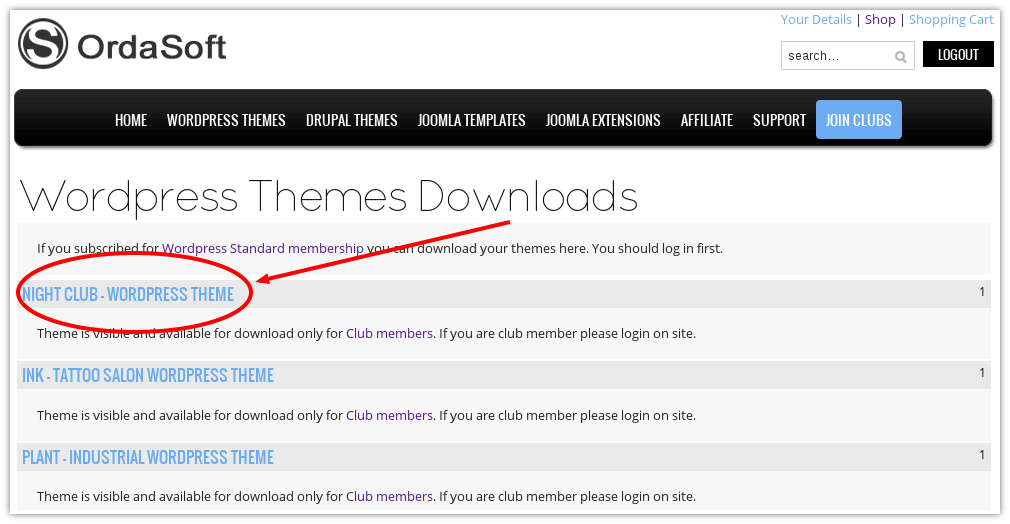
5. Choose needed product
Here you will find all Ordasoft themes, templates or extensions sorted by the date. So at the top you will see the latest our products. To find necessary product easily use Ctrl+F.
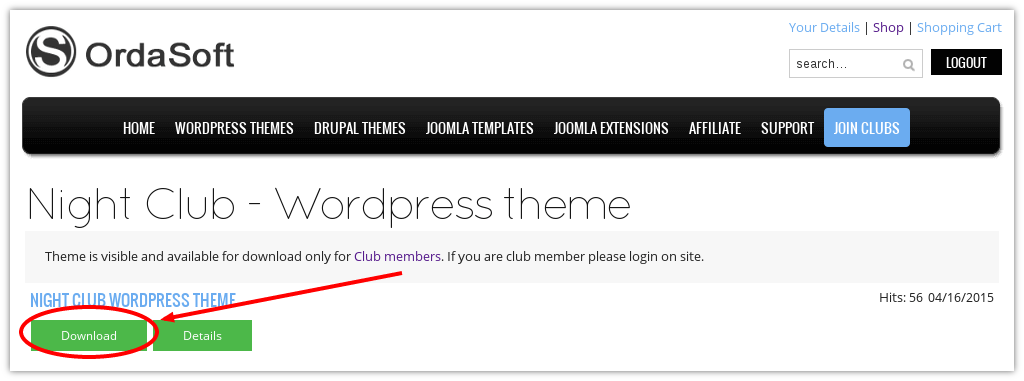
6. Download file
Voila =) Press download button and process will begin.
How to install Joomla Plugin?
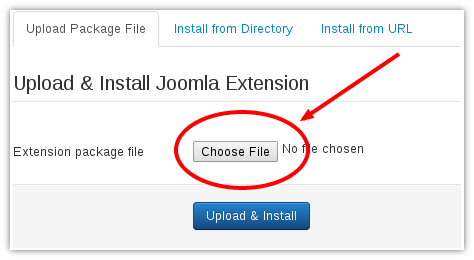
In this tutorial we will describe how to install Joomla plugins on Joomla based website. Installation of additional plugins in Joomla is so easy. All you have to do after downloading the plugin you wish to install and go to your Joomla admin area -> Extensions -> Extension Manager. In the Upload Package File section click Browse and locate the archive of the plugin you wish to install. Then click Upload File & Install to upload the file and complete the installation.
Step 1. Login to your Login to your Joomla Admin area > Extensions > Extension Manager.
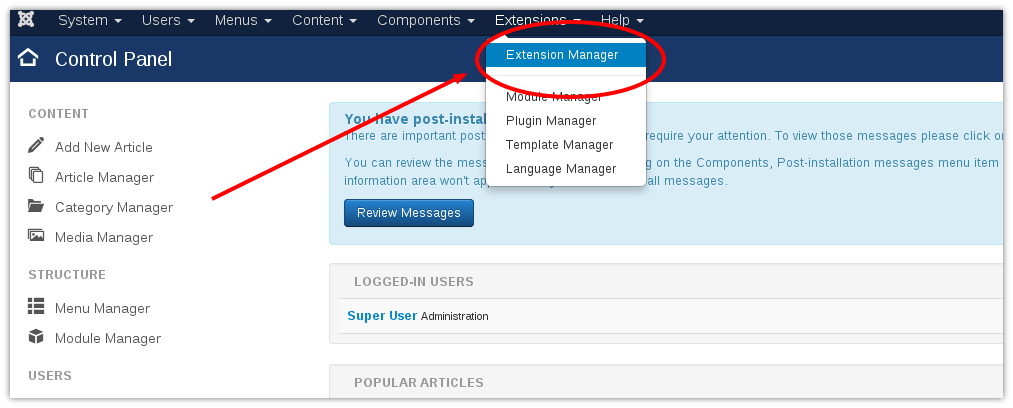
Step 2. In Extension Manager:
- In the Upload Package File section click Browse, select the component file that you want to install;
- Click Upload File & Install to upload the file and complete the installation
Step 3. Login to your Joomla Admin area > Extensions > Plugin manager
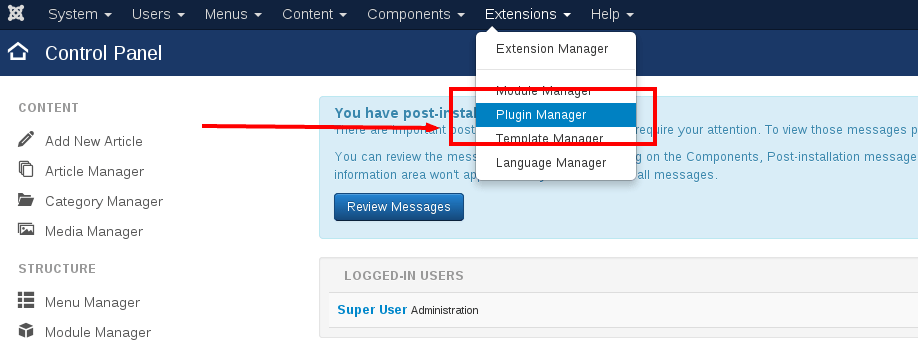
Step 4. We are looking for in the list name similar to the name of your plugin as the plugin name and the name in the list of installed plugins may be different. Once you've found your set just plugin, put against his name, check mark and click on the button Enable.

Step 5. Another option, enable the plugin is to click on his name and go to page of plugin settings. There, in the Enabled set to Yes. And you can also configure the plugin that also happens can be done, as different plugins have different functionality
Download free OrdaSoft plugins for Joomla in Free Joomla Extensions
How To Install Joomla Quickstart Package?
In all Joomla template packages created by OrdaSoft you can find Quickstart Package. A Quickstart pack is actually a complete demo website and an entire Joomla package containing the CMS, components, modules, template, other necessary data, and configurations. In case of Quickstart, you don’t have to manually create or suit modules, component data or configure the CMS. Quickstart Package allows you to install Joomla template with demo data in few clicks. We highly recommend this method of Joomla installation.
On the Ordasoft website, you can download free version of joomla templates and pro version from the joomla templates. Assuming that you Click the download button to download the file.

Figure:Download Quickstart
In order to install joomla quickstart, you need to go through the tutirial, which consists of several steps:
1. Run the Joomla Installation Wizard
Your site can be deployed either locally or remotely. Choose a way that is comfortable for you!
1.1 Uploading on server
Through FileZilla or another FTP software, upload all files from QuickStart Package folder to your website directory.
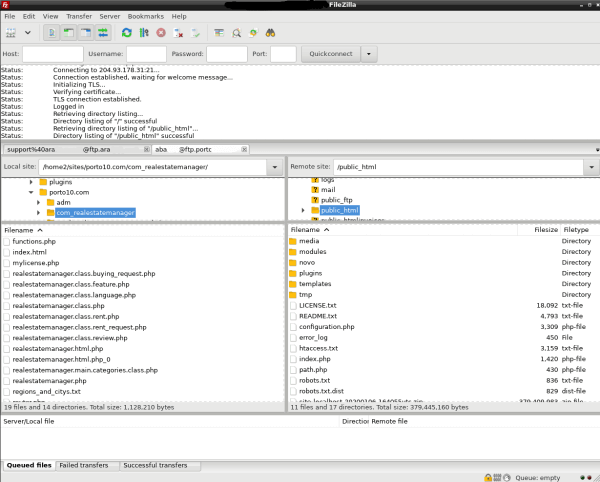
Figure:Upload Joomla Quickstart package to hosting wiht help filezilla
1.2 Install Joomla Quickstart on a localhost
For localhost install joomla quickstart, first you need to create a local web server environment. You can use any local server software you want. Start the localhost software with the web and database (MySQL) servers inside it. The initial work is done. Then upload the quick start folder to the local server. Extract the Quickstart ZIP file there. Now visit your local URL (address) in your browser, the Joomla installation window opens with the tab "Configuration".
2. Start and Configuration
To start the install quickstart package, you need to enter the directory in your browser and a step-by-step wizard will run there to help you through the installation process. On the configuration page, you'll need to select language, enter a name, site description and setup your admin details. After that click "Next"
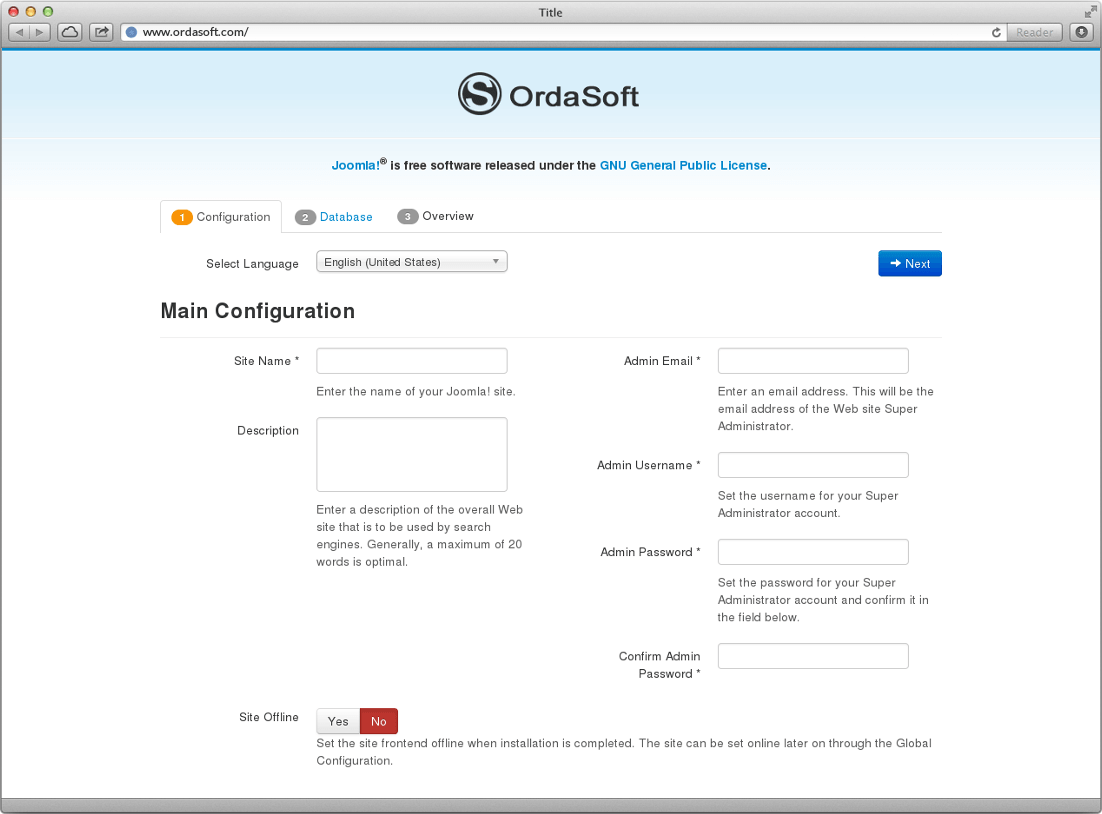
Figure:Install joomla quickstart package tutorial, step 1
3. Database
Then the "database configuration" will open. Configure Joomla with the your database. Set Database Type to MySQLi and set the Host Name to localhost. Enter database Username, Password and Database name, click "Next".
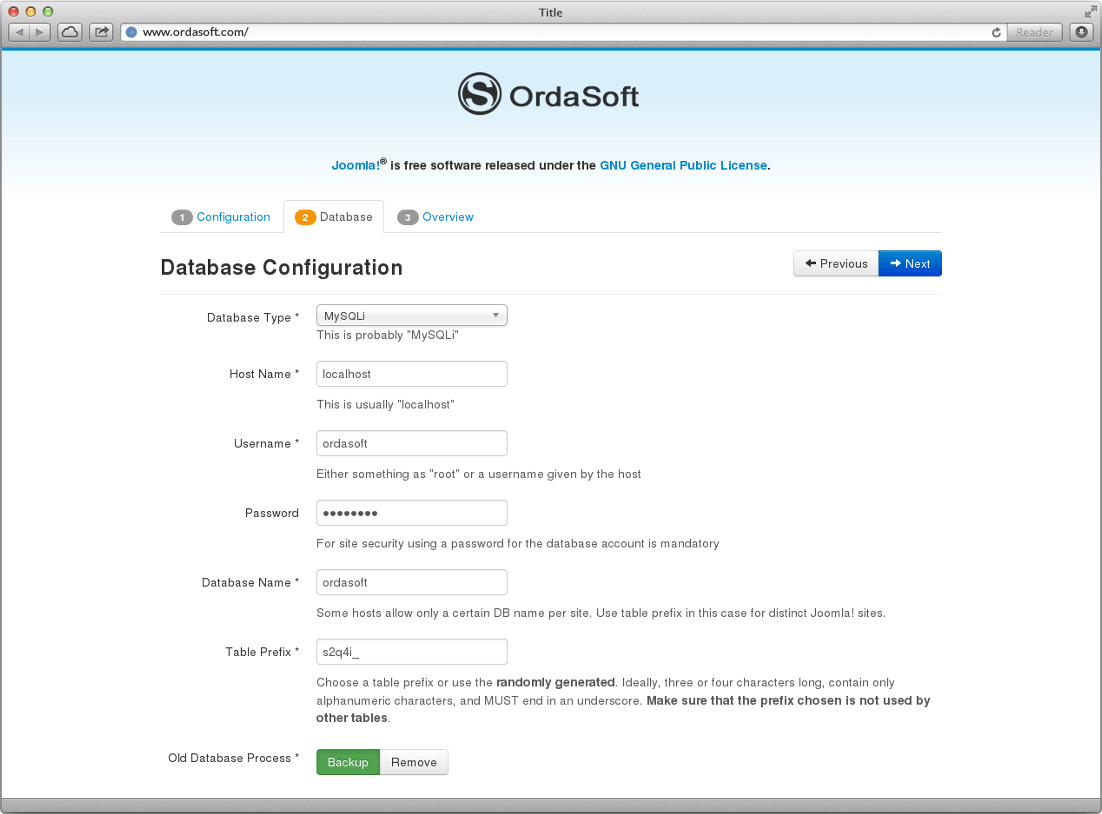
Figure:Install joomla quickstart package tutorial, step 2
4. Overview
Click "install" in the "Overview" tab and installation will begin. For successful template installation you need to install sample data, select Default English (GB) Sample Data, click Next.
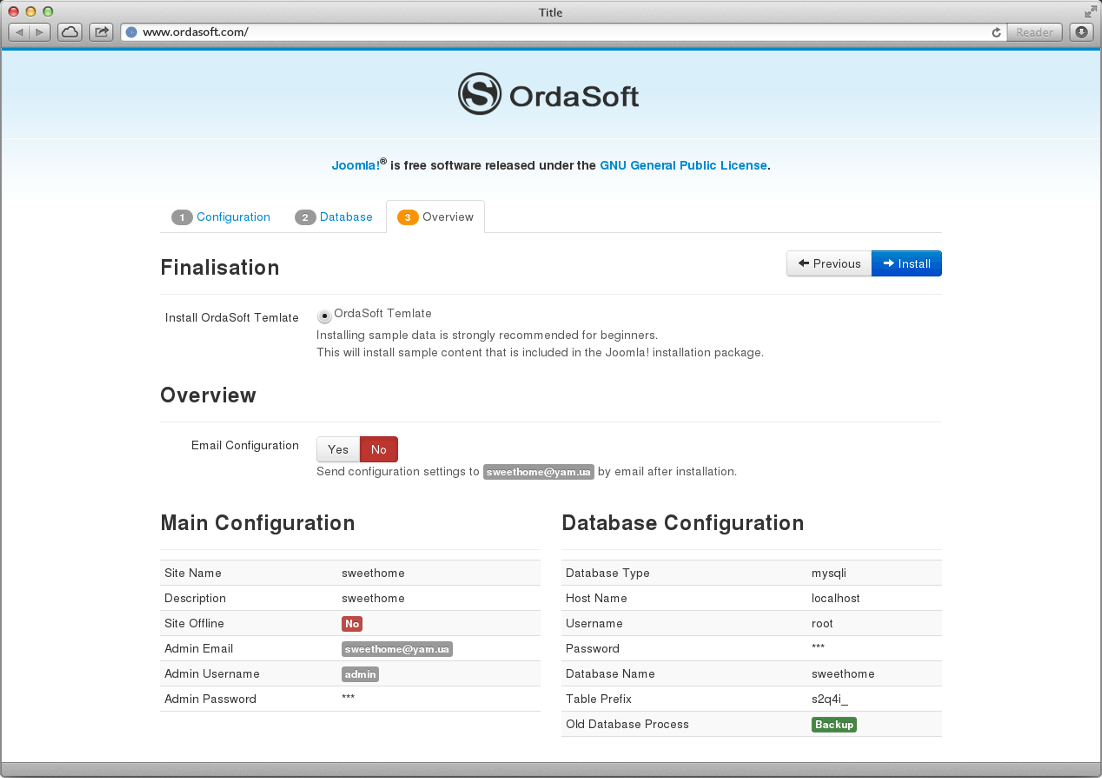
Figure:Install joomla quickstart package tutorial, step 3
5. Finish
Congratulation, Joomla! is now installed! The last step needed is to remove the installation directory! We hope you will be benefited from this tutorial.

Figure:Install joomla quickstart package tutorial, step 4
Check out the latest Joomla templates
How to install Joomla Module in Joomla 3?
Also read How to install Joomla Module? (For Joomla 4, 5, 6.)
In this tutorial we will describe how to install Joomla modules on Joomla based website. Installation of additional modules in Joomla is so easy. All you have to do after downloading any Joomla module is go to your Joomla admin area → Extensions → and select "Install" from the dropdown. This will take you to the extension installation page. In the Upload & Install File section click Choose File and locate the archive of the module you want to install. Then click Check and Install to upload the file and complete the installation.
Step 1. Login to your Joomla Admin area → Extensions → Extension Manager.
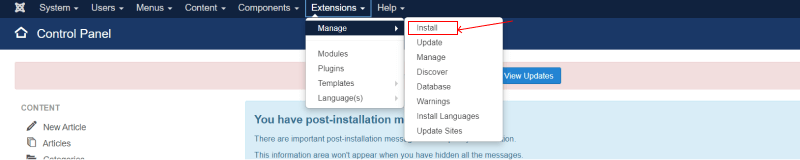
Step 2. In Extension Manager:
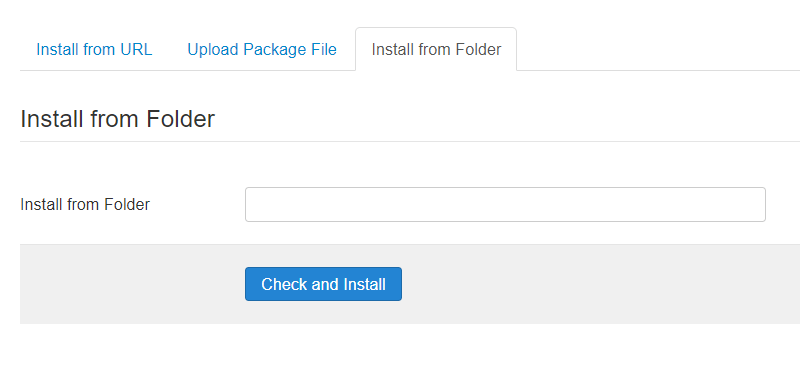
- Choose how you want to install your module: Install from URL; Upload Package File; Install from Folder.
- a. Upload Package File: If you have downloaded the module as a package file (usually a ZIP file) from the developer's website or a trusted Joomla extension directory, you can click the "Browse" button and select the package file from your computer. Once selected, click the "Upload & Install" button to install the module.
- b. Install from Directory: If you have manually uploaded the module files to your Joomla server, you can specify the directory path in the "Install from Directory" field. Make sure the module files are in the correct directory structure as required by Joomla. After entering the directory path, click the "Install" button.
- c. Install from URL: If the module is hosted on a remote server, you can enter the URL of the package file in the "Install from URL" field. Ensure that the URL points to a valid package file (ZIP file). Once entered, click the "Install" button.
- In the Install Joomla Extension section click Choose File, select the module file that you want to install;
- Click Check and Install to upload the file and complete the installation.
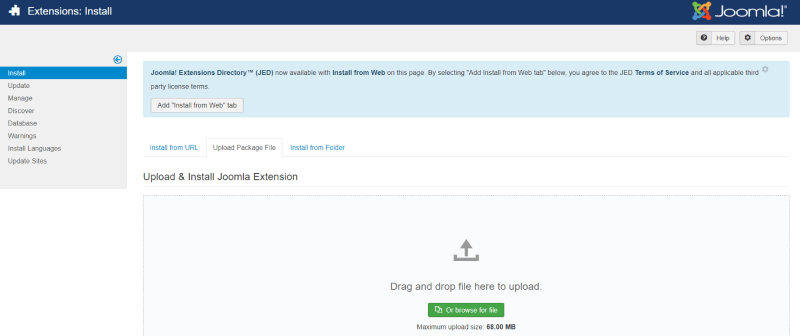
Step 3. When you click the Upload button, the Joomla module will upload successfully.
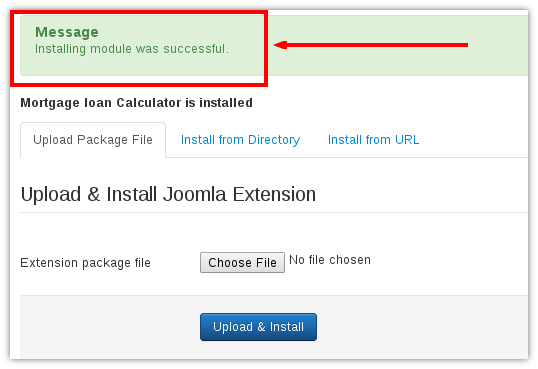
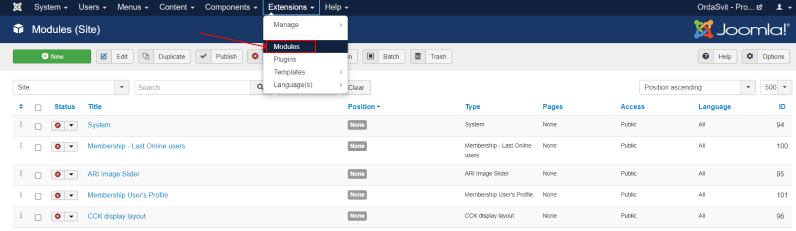
Step 4. We need to publish the module, In the top menu Extensions → Modules, find the list of required module and position the module in the column on the website click on the red square to make it a green check mark
More Articles:
More Articles...
Page 7 of 8

we support payment systems