If you are wondering how to create a blog website, this tutorial will be useful for you! A website builder has all the necessary features to create a blog on your site. This tutorial will show you the powerful features the website builder offers for a blog and how to make a blog on your website easily and quickly with Joomla CCK for blogs.
In this article we will give a step by step guide of how to manually create a Blog Website from the start, but you can also Import any Blog Template with just few clicks. Read More about Joomla CCK Template Import.
You can see how modern your blog website can be by visiting our section of ready-made Joomla templates for the weblog. Each template includes a modern blog section that covers different blogging topics! The website builder allows you to create a blog on any website. It can be a real estate agent's blog, an auto dealer's blog, a recruiter's blog, or just a modern blogger's site with posts, photos, and videos. Now, more than ever, it is important to blog and write weblog posts on your site!
By creating a blog on your website, you attract more interest in your site's content, thereby increasing its ranking in Google search. A useful feature of the Joomla CCK is that you can not only create polls for articles and allow users to comment on articles but also create subscriptions, ask questions, and add personal content. These features enable you to make a lively blog and significantly increase site traffic!
Simple steps to create a blog on the website
To start creating a blog on your website, you just need to upload and install website builder on your site! Then, follow the standard page builder scheme. Create a blog entity on your website, create layouts to add and display the blog on your site, and create instances of your blog articles.
- Entity: The class that will merge all blog posts into a unified structure;
- Layouts: For adding and showing blog posts on your website;
- Instances: All blog articles..
Creating an Entity - Blog
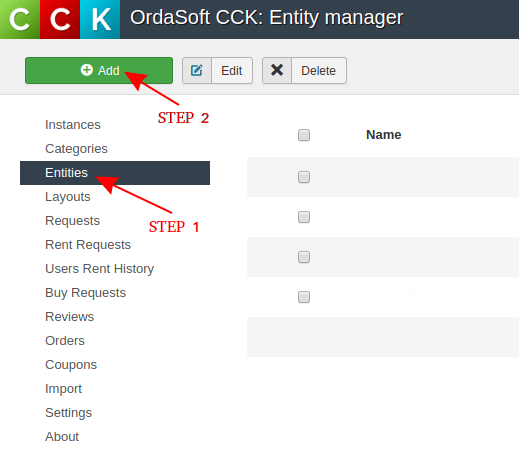
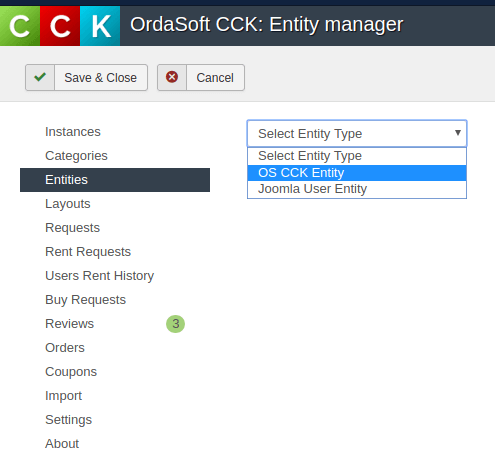
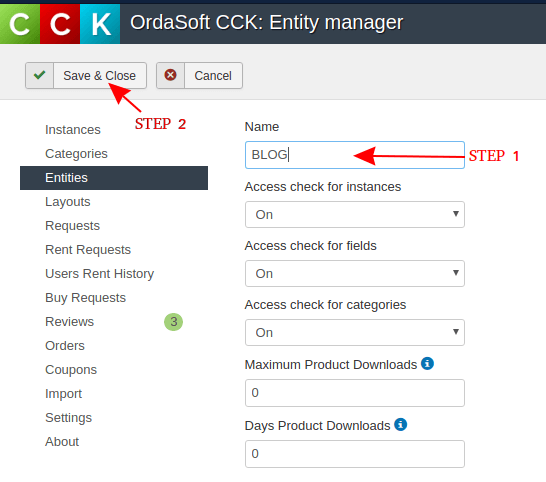
To start creating a blog website using Joomla CCK you need to create an entity - Blog. The entity helps you to merge the entire blog structure with content. To create entity, go to "Admin Area" → "Components" → "OS CCK" → "Entities" and click on the "Add" button. Next, Select the "Entities type" → "OS CCK Entity". In the window that appears, fill in the Name field (BLOG) and click "Save and Close".
This simple step creates the main linking class Entity - Blog in Joomla CCK. This class will help us link all the layouts we will create next.
Creating Layouts to Add and Show Blogs on Your Website
Add Instance layout - "Add Blog Post"
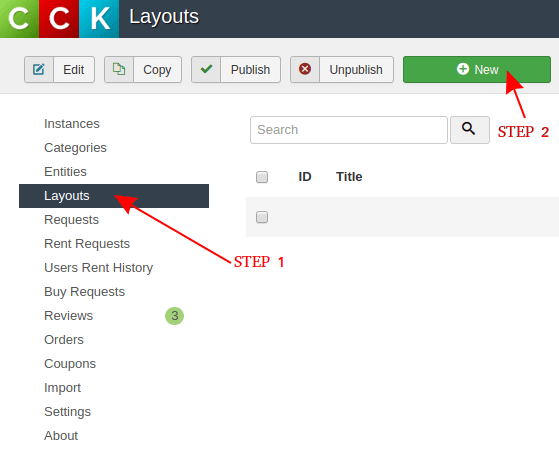
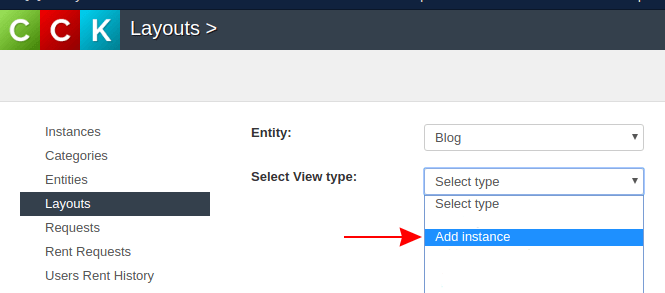
Now we come to the main stage, which is the construction of our blog layouts. Navigate to "OS CCK" → "Layouts" (1 STEP) → "New" (2 STEP) → Choose our Entity Blog and select layout type → "Add Instance".
In the window that opens write the name of the layout (1 STEP) → press the "New Row" button (STEP 2)
By clicking on it, you can choose the number of columns for the first row (from one to four). Select the number of columns where you will arrange your fields. After you add the fields, simply drag and drop the fields you need from the left column into the display area.

Create fields for "Add Blog Post" layout
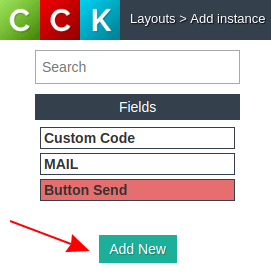
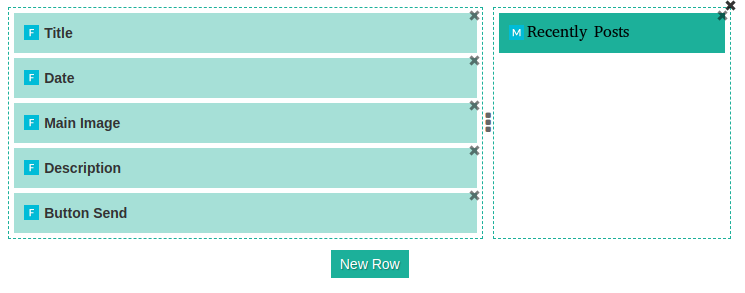
The next step to make a blog website is to create the necessary fields. These fields are what you or the users of your website will fill in when writing a blog post. First, press the "Add New" button → in the window that opens, press the "New" button → write the field name and choose field type. The choice of field type depends entirely on the field you want to create. If this field is a picture, choose the Image field; if it is the date of publication, choose the Date field. You can also select the video field to merge your YouTube blog with your website blog.

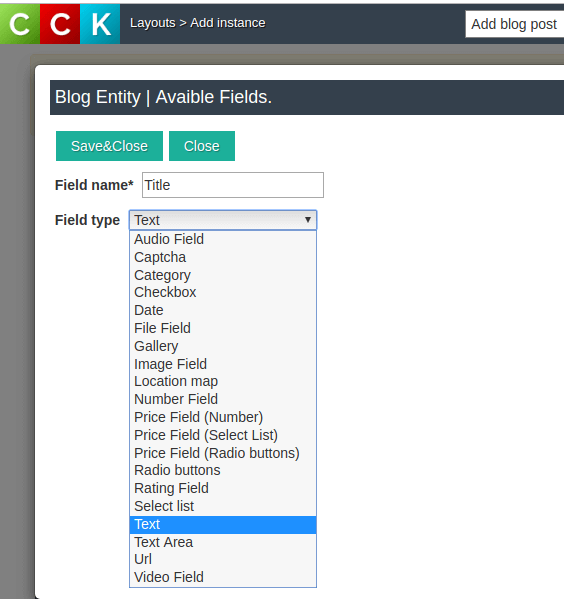
For example, we created fields that we considered important for adding a blog post: blog post title (title field), date of publication (Date field), Blog Post Main image (image field), and article text (textarea field). You can create any field to make an awesome blog website!
Layout - Add Blog post - backend view
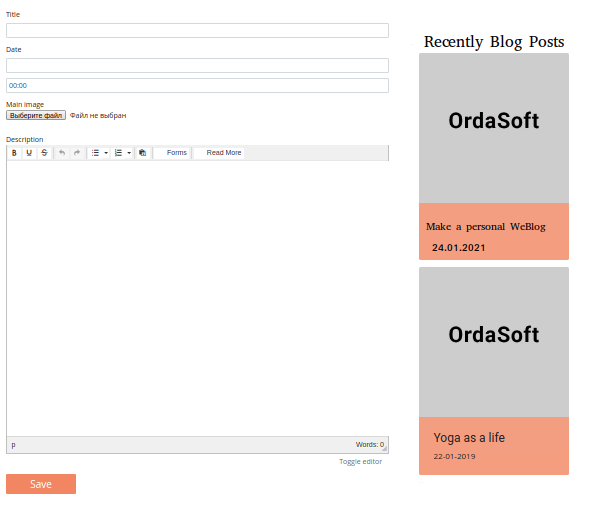
Layout - Add Blog post - frontend view. This is how adding your blog post will look on your website.
In the image below, you also see Recently Blog Posts. We will show you how to add and create "Recent Blog Posts" later.
Show Instance layout - "Show Blog Post", first step
The last step in creating layouts is to create a display of blog posts on your blogger website.
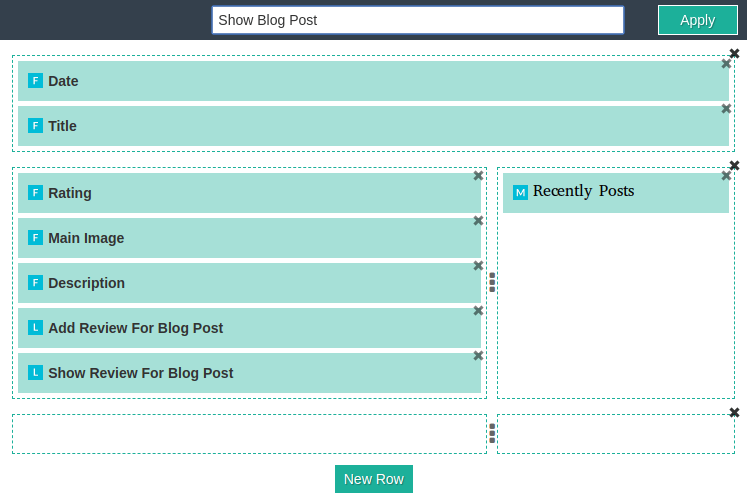
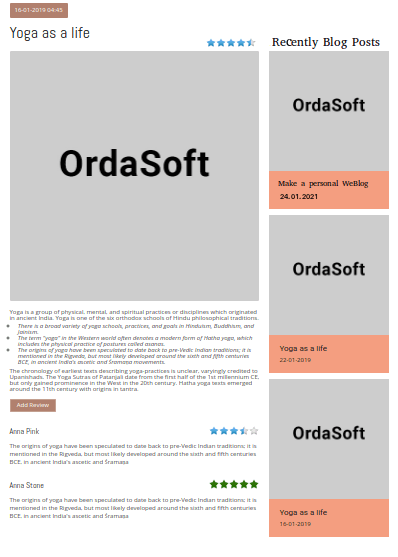
First, create a layout to show a single post on the website. For that, create a new layout → choose the layout type - Show Instance. In the window that opens, drag and drop the fields you want to be displayed when viewing a single post. In the pictures below, we showed an example of how a blog post would look on the frontend and backend of the website. The main fields of the blog include the date of publication, the name of the blog post (title field), rating, the main image (image field), and text of the post.
The next step is to attach the layout for adding and showing comments. For that, go to Attach Layouts → press the "New" button → aselect the add review layout, then drag and drop it to the desired position. (STEP 1)
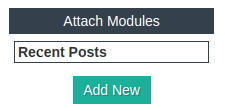
To add recent posts, go to Attach Modules → press the "New" button → and select Recent Post Layout(STEP 2)
Backend view of Show Blog Post Layout
Frontend view of Show Blog Post Layout
How add to your blog website the Review layouts and Recent posts layout we show to you later
Show Instance layout - "Show Post", for "Show all blog posts" layout
To display all of our blog posts in three columns, we need to create a layout in advance that will show the view of one blog post with brief information. Create a new layout → select the layout type "Show Instance" → and drag & drop fields, such as date, title, and description → the "Save" button.

Show all Instance layout - "Show all blog posts"
Now we have created a layout to show all blog posts in 3 columns. To do this, create a new layout → select the type of layout - "Show all Instance".
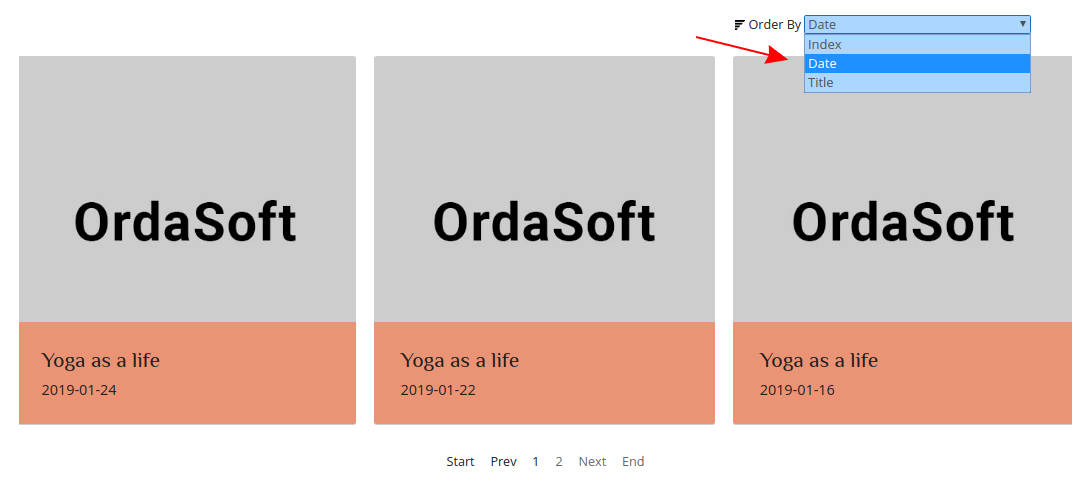
If desired, drag the field, "Order By" to allow sorting blog posts by rating, by date of publication, or by any other criteria important for you. In styling options, select "Order By" in Instance fields for order → necessary fields for sorting.
Next, choose in Attach Layout Module the previously created layout - "Show Post" and drag & drop it to the selected row, then press the "Save" button.
Backend view of "Show all blog posts"

Frontend view of "Show all blog posts"
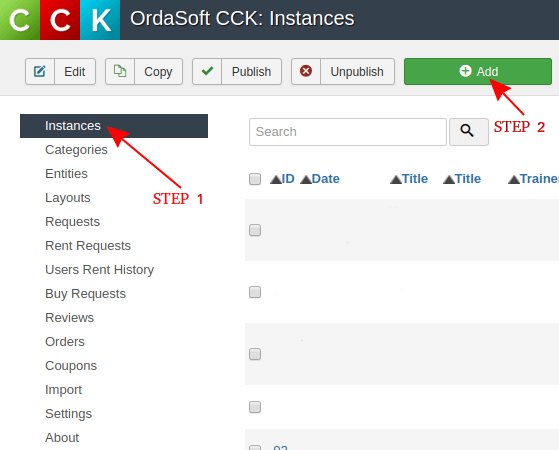
Create instances - make your first Blog post!
Finally, we move on to creating and writing blog posts on your website. Go to the Instances tab (Step 1) → the "New" button (Step 2) → choose Layout - Add Blog Post (Blog). A layout you created to add a blog post will open. You can now create your first blog post with the Joomla CCK! With this tutorial, you have been able to step-by-step create your weblog!
Demonstrate your recently blog posts
The Blog website builder allows you to show your most recent blog posts. To display recent blog posts as in our example, you need to create two layouts: a "Show Instance Layout" for a recent blog post and a layout for all recent blog posts - "Show all Instance".
Show instance layout for for all recent blog posts
Following the standard scheme described above, create the "Show Instance Layout" for a recent blog post. This layout will show how one recent blog post looks. Since recent blog posts will be displayed frequently on the page, add only the most important fields - main image, title, and date.

Show all instance layout for recent blog post
Based on the "show instance layout", create a "Show all Instance Layout" to show all recent blog posts. Create a new layout → select the layout type → "Show all Instance" and in the window that opens Order by field (where you can set sorting by date, name, etc.), custom code field (where you can set the title in the style settings). Next, press the "NEW" button in Attach Layouts to connect the previously created "Show Instance layout" for recent blog posts. Press "Save".

Making blog layouts for add and show review
The website builder for creating blogs includes special layouts for building and displaying reviews, allowing communication with your blog. Visitors to your website will be interested not only in reading your blog but also in commenting and rating your posts.
To add a review (comment) and display the review, the website builder has two special layouts. One for adding a review and one for displaying a review.
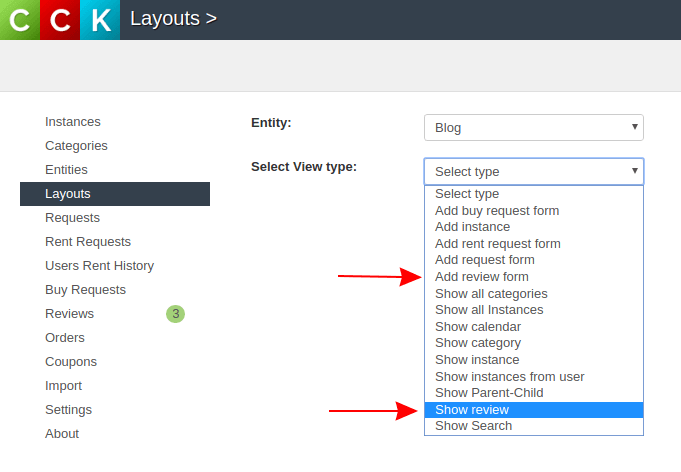
Creating layout for add a review to the weblog
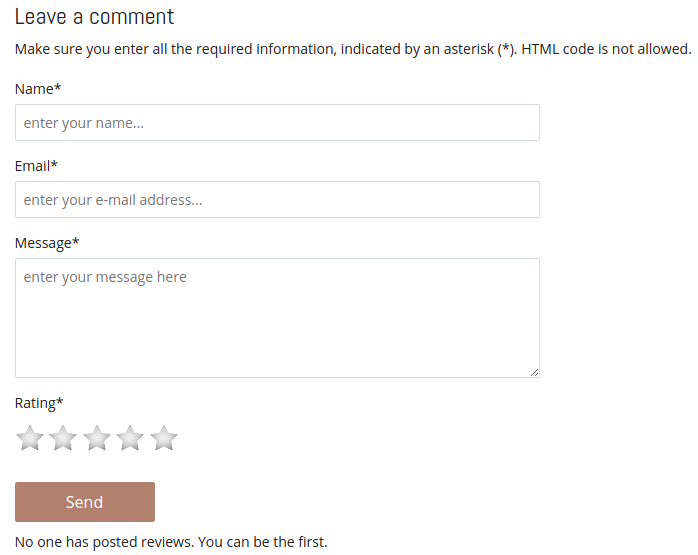
Creating a layout to add a review to the weblog is the same as building any layout in the website builder. The only exception is choosing the layout type → "Add Review Form".
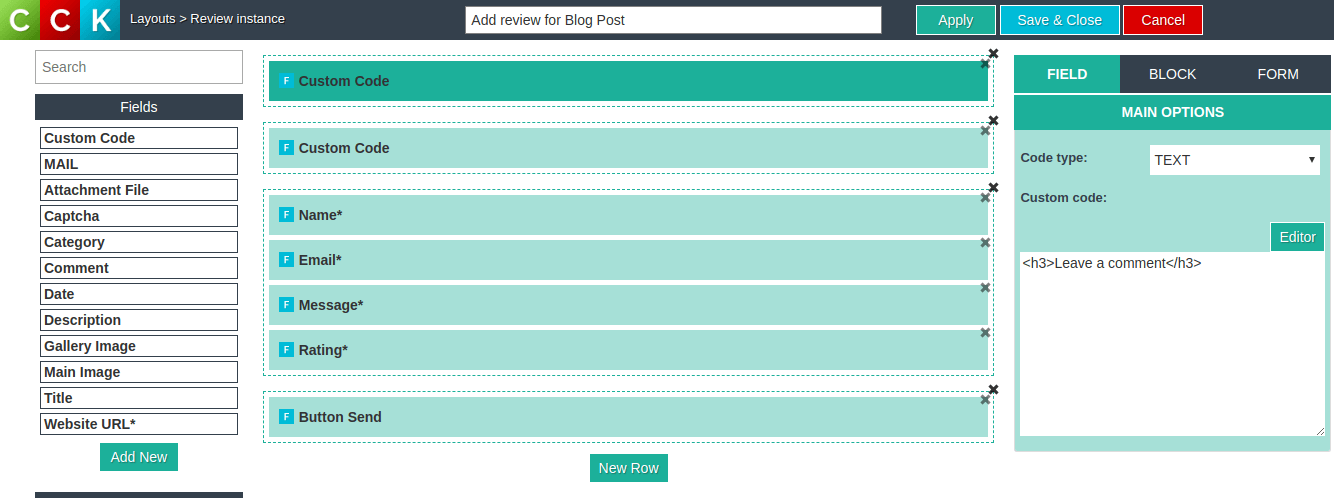
Next, add the necessary fields for adding a review: two custom code fields (where you can leave hints for reviews), name, email, message, rating, and a send button.
Backend view of Layout - Add review for a blog post.
Frontend view of Layout for Add review to a blog post.
Creating a Layout to Display Reviews
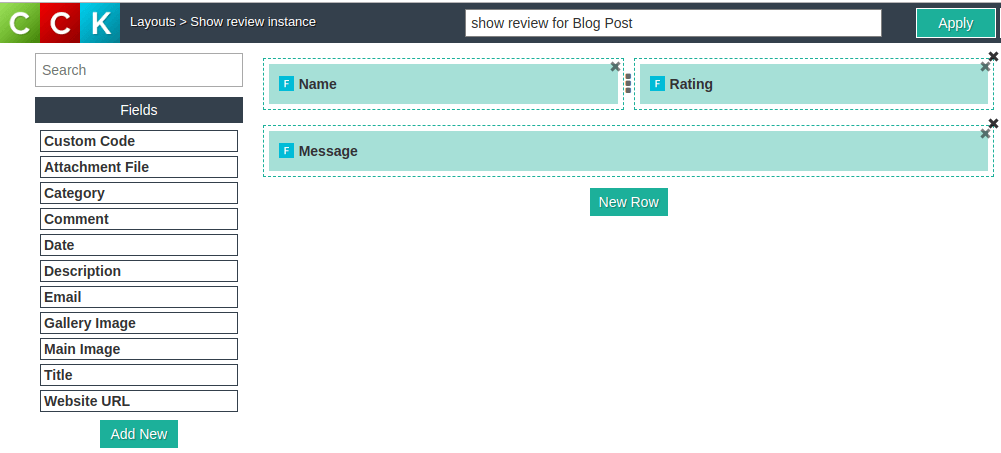
To create a layout for displaying feedback, create a new layout → select the layout type - "Show Review".
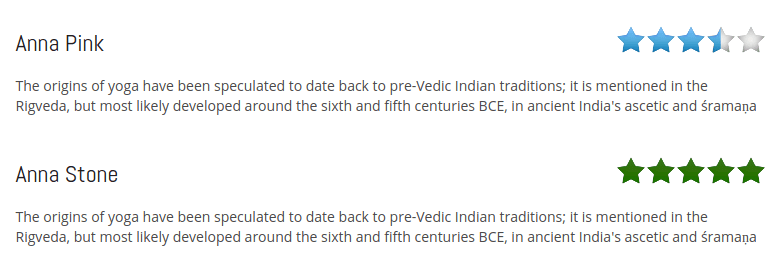
Drag and drop the necessary fields to show the review. For example, place the name and rating fields on the same level, with the message field below.
Backend view of Layout for show review.
Frontend view of Layout for show review.
Show Instance layout - "Show Blog Post", second step
And the second step in creating show post layout - Attaching Layouts to Show Comments and Recent Posts
First, create a layout to show a single post on the website.
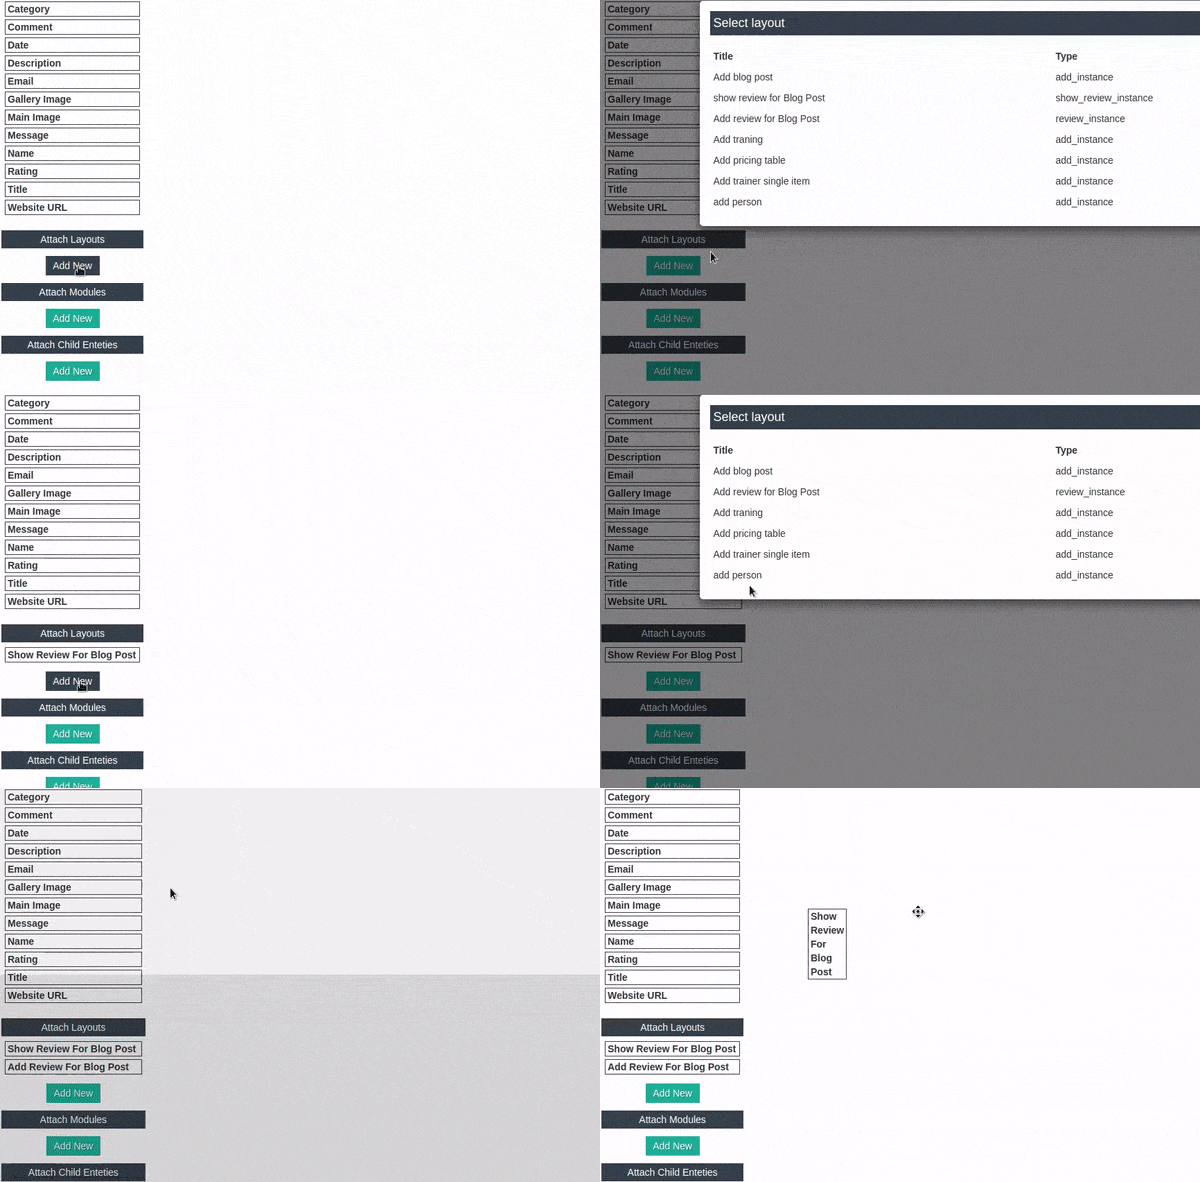
Next, attach the layout for adding a comment and the layout for showing comments. Go to Attach Layouts → press the "New" button → select the add review layout, then drag and drop it to the desired position (Step 1).
To add recent posts, go to Attach Modules → press the "New" button → select Recent Post Layout (Step 2).
STEP 1
STEP 2
Backend view of Show Blog Post Layout

Frontend view of Show Blog Post Layout

Additional Features of the Website Builder
This article covers only the basic features of the Joomla CCK. However, the possibilities of building a modern blog site using the website builder are not limited to the features described here. By downloading the page builder, you gain the ability to create blogger sites, e-commerce sites, booking systems, event organizations, communities, and even a family tree! All these features help create a modern, next-generation weblog! Run your blog, create a community of fans, organize events (meetings with other bloggers), and do e-commerce on your blogging site - build your site with unlimited possibilities with the website builder!
- You can test and rate various features of the website builder by exploring the pre-made website builder templates!
- You can also find web templates ideal for bloggers, created with the help of the website builder
More info about "How to make a blog website on website builder for blogs" you may check in below video:

